Contents
Hey there!
Welcome to lesson #3 of the profitable blog class.
If everything went according to plan yesterday you’re now the proud owner of a brand new domain name and web hosting account.
Today we’re going to take that basic account and actually install a blog on it.
By the end of today’s lesson you’re going to have a basic blog in place that you can actually look at and send friends to – so this is exciting stuff!
How to Install WordPress
There are a number of different pieces of software that allow you to set up your own blog. The best, by far, is called WordPress.
Fortunately, not only is WordPress a free piece of software, but it also comes built in to BlueHost (another reason I recommend them).
What we need to do is to actually install this software on your domain – but this is simplicity itself.
Here’s how to do it…
You remember the email you got yesterday when you signed up with BlueHost? Go grab that, and follow the information so you can log into your web hosting control panel.
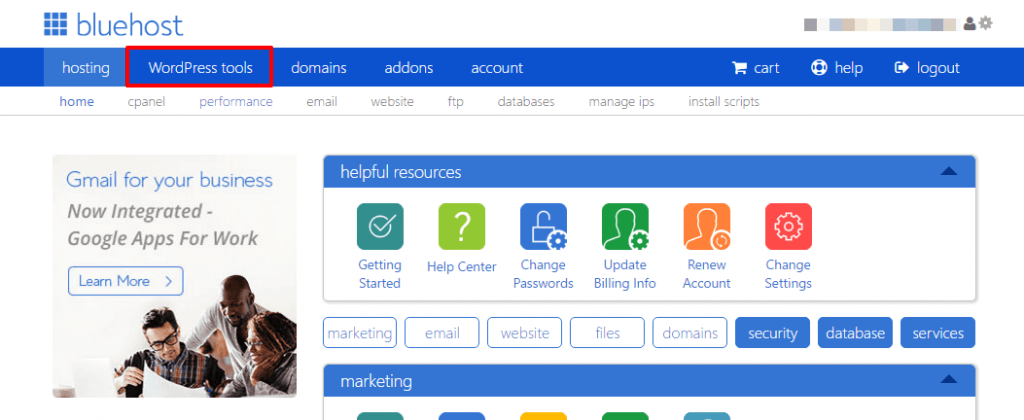
2) Go to “WordPress Tools”
Once you’re logged in, select the “WordPress Tools” option at the top of the page.
3) Enter Your Details
Here we’ll install WordPress in a matter of moments. You’ll want to fill in some basic details, using the tips below…
Domain – Make sure this box shows the domain you chose yesterday.
Path – Leave this blank.
Site Title – Give your site a name. You can always change this later so it doesn’t have to be perfect. For Frugality Magazine, of course, I just chose “Frugality Magazine” and moved on to the next box.
Admin Username – A username that you will use to log into your blog to add content. Make this whatever you like as only you’ll see it.
Admin Password – Choose a password for WordPress, making sure it’s different from your BlueHost password. Be sure to make a note of both the username and password you’ve chosen.
Admin Email – Just enter your email address here.
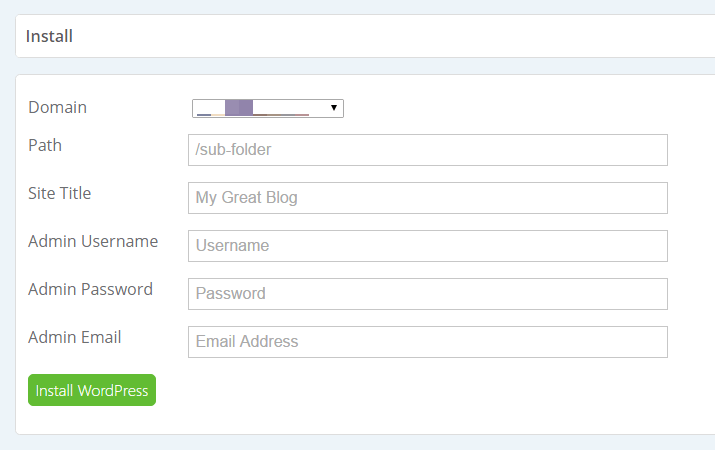
Then click the green “Install WordPress” button and you’re good!
4) Go Visit Your Site!
If all goes according to plan you’ll get a shiny notification to tell you that the set-up was a success.

You can now actually visit your domain name and see what your blog looks like!
Now, to be fair, your blog will probably look quite boring right now. The standard design of WordPress is quite “dull”, and of course you won’t have added any articles yet.
But don’t worry! In lesson #4 we’ll discuss how to change the appearance of your blog and make it truly beautiful – and it’s a lot easier than you might think.
Until then, why not spend some time in your WordPress admin area (you’ll find it at YOURDOMAIN/wp-admin) just looking around and getting comfortable with all the options. See you in the next part!


Add comment